Welcome all the
Totally Groovy quilt a long folks!
I love all kinds of piecing, but it took me awhile to love piecing curves with traditional templates. With anything, it takes lots of practice and repetition to develop that love. Back in 2010 I wrote a tutorial for
piecing curves the traditional way...with templates and pins called "Conquer Your Fear!" I pretty much piece all my traditional curves this way except I now eliminate the pins. Check out that tutorial for all the basics of traditional curved piecing.
If you're just beginning, use some pins. I pulled out Emily's templates from the pattern you're using and made a few just so I'd know what you're tackling. Since the Conquer Your Fear Tutorial was done with half circle templates, and this quilt requires quarter circles, I thought I'd share the steps again.
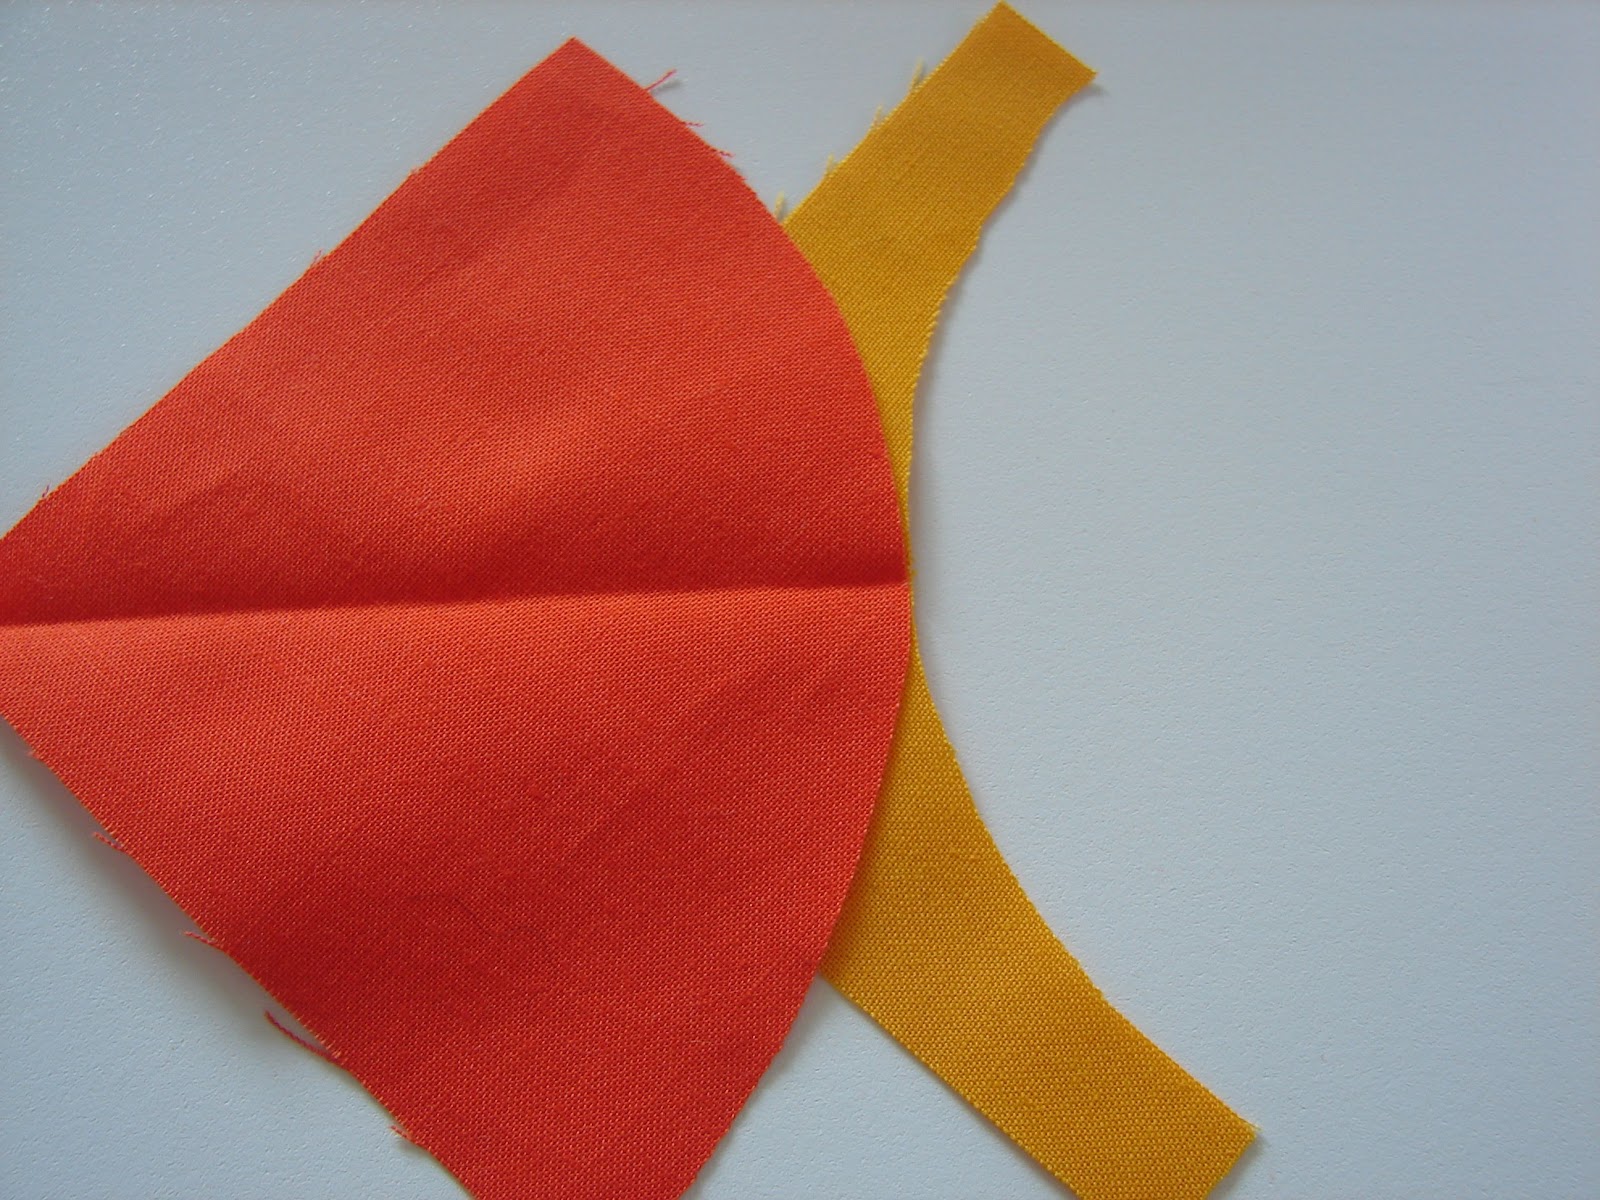
First, cut your inside and outside pieces and press each in half to make a registration mark and place them as shown below. Notice the folds are opposite.
Place the inner circle as shown. The folds will nest together.
Turn over and pin from this side, with the outer template on top. Use small sharp pins and pin close to the edge of the curve.
Then match the edges and pin and ease the curve together aligning the edges and pin half way between the center and the edge. This is probably enough pins to successfully sew this small curve.
If you want or need a little extra stability, add additional pins between each of the first set of pins.
Now it's time to sew. Set your stitch length a little bit smaller than what you usually piece with. Smaller stitches will flow easier around a curve. I sew with the outside template on top. This allows me to see and manage the bulk of the curve. Drop your presser foot and remove the first pin. I don't recommend sewing over pins. DANGER!
Sew slowly keeping edges aligned. Resist the urge to force the curve into a straight line. Notice how the piece is curving away from the presser foot. The only place that needs to be straight is at the foot and about 1/4" in front of the foot.
Continue to sew slowly, stop with the needle down, remove the next pin, and continue sewing.
The final inch of sewing can be tricky. You may want to use a stiletto or skewer to hold the pieces in places after you remove the final pin.
Press and you're done. No fancy feet needed, just a little effort and some practice and you'll be sewing great curves in no time. Let me know if you have questions and I'll try to answer them in the comments.
By the way,
Alyssa is having a little giveaway sponsored by Fresh Modern Fabric to celebrate this tutorial and keep you motivated.