Showing posts with label tutorial. Show all posts

Tuesday, November 20, 2012

The Non-Invisible Invisible Zipper

The pillows for my mom are finished! I'm on a roll. Here's hoping I can continue the momentum.

 I wanted a zip pillow finish, but I dislike working with invisible zippers. When the original pillows from the book came home to me, two of the invisible zippers were broken. Invisible zippers are finicky and in my experience they don't wear well.  So, I looked for a new zipper option.
Low and behold I found a brilliant zipper tutorial by Autumn on Sew Mama Sew.  That Sew Mama Sew site is one of the best online sewing resources.  I installed this zipper in seven minutes flat.  Easy peasy and uses a regular zipper.
The greatest thing is that it has its own invisibility cloak.  The flap covers the zipper and adds a little punch to the back of the pillow.  Love that.  It's clean, neat and professional looking.
I won't be making pillow backs any other way.

Thursday, August 23, 2012

Piece Those Curves! (To Be Totally Groovy!!)

Welcome all the Totally Groovy quilt a long folks!

I love all kinds of piecing, but it took me awhile to love piecing curves with traditional templates.  With anything, it takes lots of practice and repetition to develop that love.  Back in 2010 I wrote a tutorial for piecing curves the traditional way...with templates and pins called "Conquer Your Fear!"  I pretty much piece all my traditional curves this way except I now eliminate the pins.  Check out that tutorial for all the basics of traditional curved piecing.

If you're just beginning, use some pins. I pulled out Emily's templates from the pattern you're using and made a few just so I'd know what you're tackling.  Since the Conquer Your Fear Tutorial was done with half circle templates, and this quilt requires quarter circles, I thought I'd share the steps again.

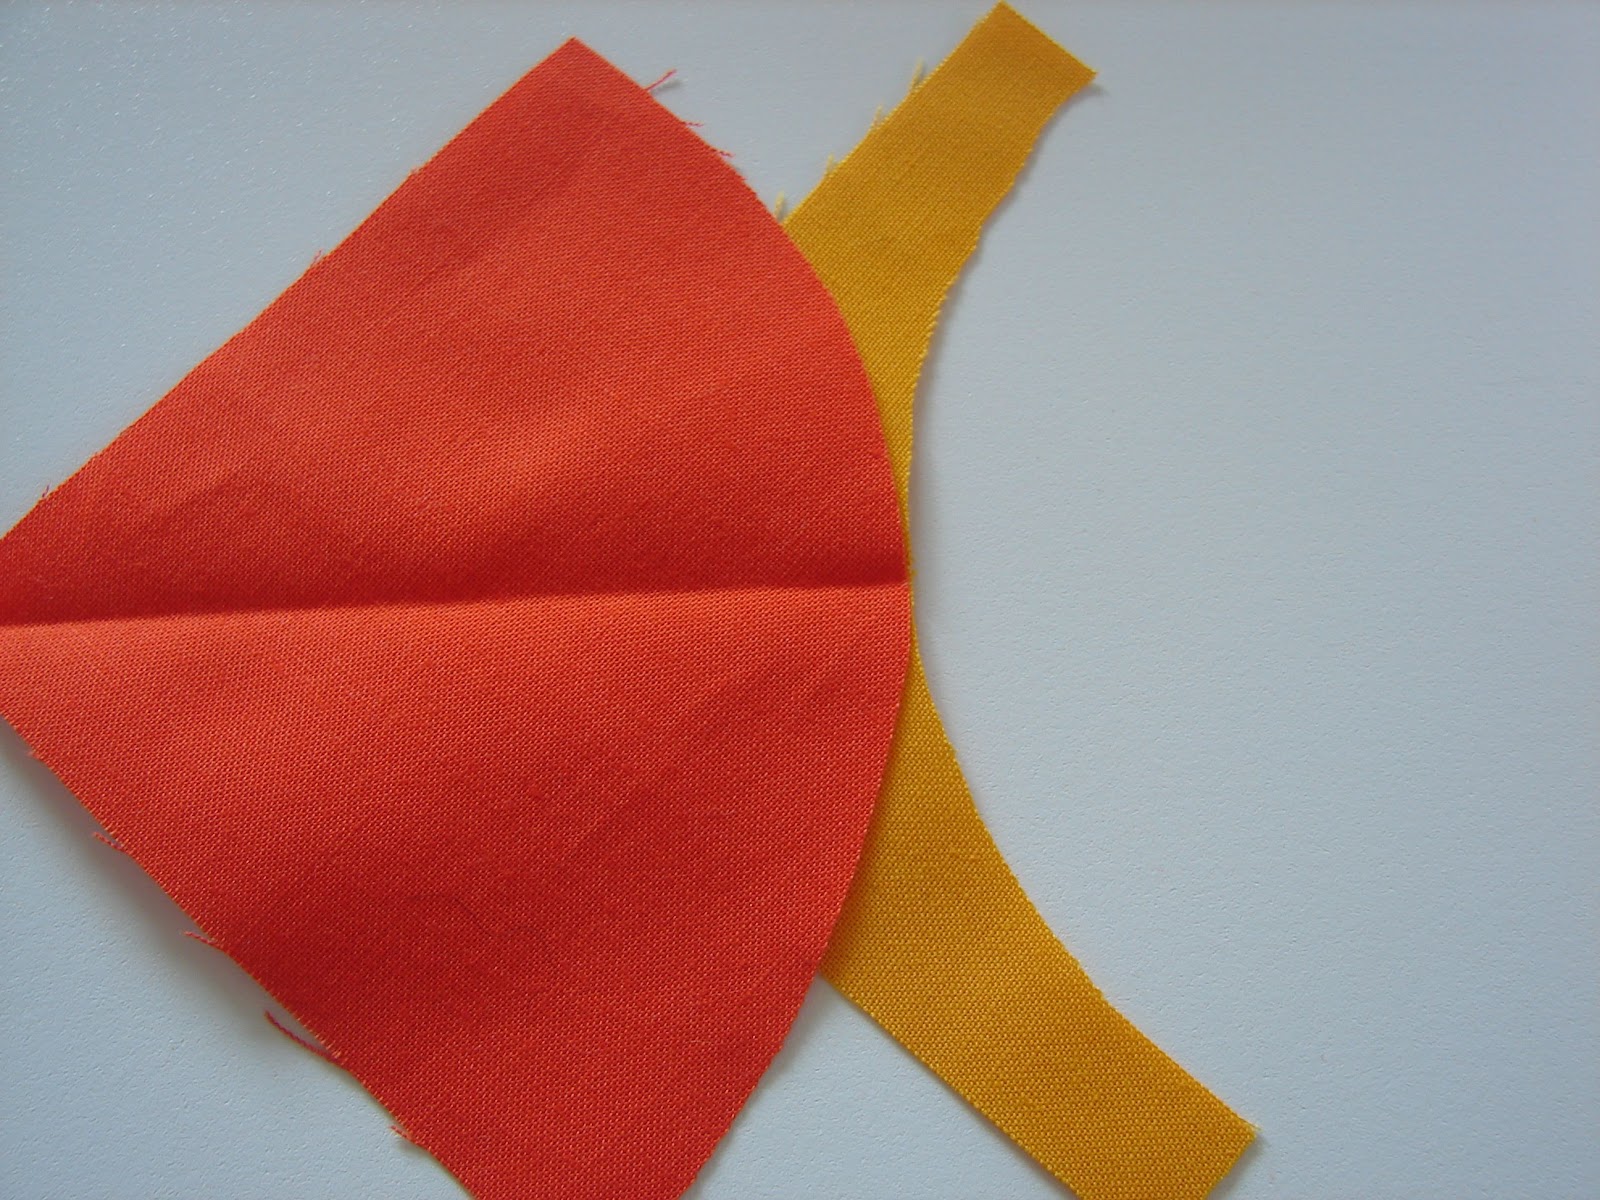
First, cut your inside and outside pieces and press each in half to make a registration mark and place them as shown below.  Notice the folds are opposite.

 Place the inner circle as shown.  The folds will nest together.
 Turn over and pin from this side, with the outer template on top.  Use small sharp pins and pin close to the edge of the curve.
 Then match the edges and pin and ease the curve together aligning the edges and pin half way between the center and the edge.  This is probably enough pins to successfully sew this small curve.
 If you want or need a little extra stability, add additional pins between each of the first set of pins.
 Now it's time to sew.  Set your stitch length a little bit smaller than what you usually piece with.  Smaller stitches will flow easier around a curve.  I sew with the outside template on top.  This allows me to see and manage the bulk of the curve. Drop your presser foot and remove the first pin.  I don't recommend sewing over pins.  DANGER!
Sew slowly keeping edges aligned.  Resist the urge to force the curve into a straight line.  Notice how the piece is curving away from the presser foot.  The only place that needs to be straight is at the foot and about 1/4" in front of the foot.
 Continue to sew slowly, stop with the needle down, remove the next pin, and continue sewing.
The final inch of sewing can be tricky.  You may want to use a stiletto or skewer to hold the pieces in places after you remove the final pin.
 Press and you're done.  No fancy feet needed, just a little effort and some practice and you'll be sewing great curves in no time.  Let me know if you have questions and I'll try to answer them in the comments.
By the way, Alyssa is having a little giveaway sponsored by Fresh Modern Fabric to celebrate this tutorial and keep you motivated.


Monday, October 25, 2010

Christmas Is Coming...A Quick Tutorial


I decided to make these into pillows instead of potholders. I'm not sure I could see a grease stain on these. With pillows I can take them out once a year and they'll last a long time. So many of you asked how I made these, so I put together a brief tutorial. Start with a really cute picture that your children have drawn for you. The first step is to transfer the essence of the drawing into a simple line drawing.

I used my studio window as a light box and taped the drawings to the window, put paper over them and traced. You might be able to use a copier too. I added little details like the belt, mittens and buckle free hand. I just traced the outline to get me started, but you can trace it all if that works best for you.
Now, go to your copy machine and make several copies of this drawing. Cut out the shapes that are in the drawing. Be sure to extend the legs and arms (those will tuck under the body).
When you have your paper patterns cut, you may want to mark them with an "X" on the right side. This will prevent you from cutting parts upside down.

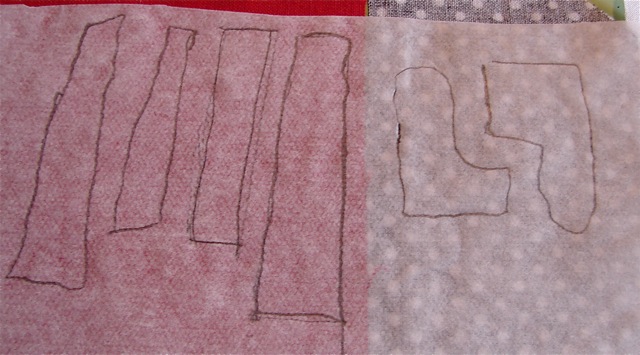
Prepare your fabrics with fusible web following manufacturer's directions. I use heat and bond light. Trace your patterns onto the paper side of the fusible. Be sure to put the "X" sides down when you trace.
The next step is to prepare your background. I used some recycled linen. Your background will need to be stabilized, or when you do your raw edge applique stitching, your piece will pucker. I use a lightweight fusible stabilizer. I iron it to the back of my fabric and then I have a nice stable surface for stitching.
Place your pattern pieces in the correct positions. Use the original drawing as a guide. When you are satisfied with the placement, fuse in place. I usually do this work on my pressing board, so there is no moving involved.

Now it's time to add the life to your piece. This is done by stitching around the pattern pieces with black thread. I stitch as close to the edge as possible. Don't worry about retracing your thread. This is a child's drawing. A little whimsy is a good thing. I usually have to do a lot of stopping and starting with a piece like this.
If you want to emphasize something, stitch over a line a couple of times. I did that on the arms and hands on this one. Add the eyes or other details with French knots or other embroidery stitches. I did the letters by machine. Go slow and easy on curves and leave your needle down and adjust every couple of stitches.
I added borders and quilted them to make pillow tops. These are 14" pillows. I think I'm going to give these to my mom and make another set for myself. I'd like them a little bigger.
A couple of hours and you've got a quilty memory. I think they'll make a great Christmas gift!

Friday, August 6, 2010

Organic Line Quilting

I made this quilt over a year ago, but a couple of weeks ago it was in a quilt exhibit at RicRac Roundup in Kansas City. A bunch of people asked me about the quilting on this one and I said I would post about it so, here it is. I dubbed the quilting on this on "organic line quilting' simply because the lines are done 'organically', or in my mind willy-nilly. Organic line quilting creates an amazing texture on a quilt. There are a couple of tricks to this kind of quilting. First, wind a lot of bobbins because you'll use loads of thread and make sure you have a full bottle of wine and some snacks because you'll need sustenance and lots of time!I start at the top center of the quilt. The lines are quilted alternately top to bottom and bottom to top. I work from the center to the edge of the quilt and then the center back to the opposite edge. It's important to use a walking foot so the quilt doesn't shift. I quilted this on my mom's little Bernina, so you don't need a fancy machine.

Notice the two blue lines in the diagram. I place two pieces of painter's tape the length of the quilt. The line in the center is to help establish the first quilting line. You want your lines to stay essentially perpendicular to the top and bottom of the quilt. It's easy to get going at an angle. That's where the second piece of tape comes in. I place it about 8 to 12 inches from the first piece. I use it as a gauge to measure the distance from the quilting lines. I want to keep that distance consistent so that the lines don't end up running at an angle. As I move across the quilt I move the second piece of tape.

As for the lines themselves, I try to relax and let it go. It feels a bit like free motion meandering, but in a straight line. Let the lines wave and flow. The lines can get very close together....they range from about 1/4" to 3/4" apart. I've done this kind of quilting on other quilts where I let the lines cross, but I like it better this way.

Any questions, let me know. Give it a try...it's amazing!

Thursday, April 1, 2010

Spiderweb Quilt Tutorial (for selvages)


I've had so many requests for how I made the selvage spiderweb quilt, I thought I'd do a quick tutorial of how I adapted Bonnie's Quiltville spiderweb tutorial to make my quilt. I'm not going to repeat Bonnie's instructions for how to make the template. You can find her instructions on the Quiltville site.

So let's get started. Using Bonnie's instructions you will make your kite templates and cut your paper foundations. You will need just a touch of glue. I use Elmer's washable glue stick. I recycle paper from my printer to use as foundations.
Here's how I trace my templates. I cut a 6" wide strip of fabric and trace the template alternated facing up and down butted against each other. I can get 13 kites from one width of fabric strip.
Next, you'll need selvages...lots of them.
Not all selvages are created equal. You will need at least 1/4" of fabric above the actual selvage for this quilt. You can make smaller ones work, but that 1/4" of fabric will make your life easier as you make this quilt. I also like to include peeks of the fabric when I use selvages so for me it's more like a 1/2" to an inch of fabric above the selvage.
For the outer ring on my spiderweb blocks I decided to include a significant amount of fabric in addition to the selvage. I wanted the quilt to be colorful and I wanted to showcase some of my favorite fabrics that I've used in quilts. The outer ring selvages ranged in size from about 2 1/2" to as small as an inch. You will need to trim your selvages so the top edge is straight and even.
Place your kite on your foundation triangle with a tish of glue as in the picture below. Now it's time to start placing selvages.
I lay the selvage face down lining up the raw edge with the edge of the kite to trim my selvage to right length. I let it extend past the foundation on each side just a bit.
Sew the first selvage with a 1/4" seam allowance. Be sure to set a small stitch length so that you'll be able to easily remove the paper later on. I set mine at 1.25 on my machine.
Flip the selvage and press. Here's where I adapt Bonnie's method. With normal fabric you would continue the stitch and flip method of the first strip. With selvages it's a little bit different.
The second selvage will be placed 1/4" UNDER the first selvage as in the picture below.
With the second selvage slipped under the first, you'll sew on top of the first selvage just a tish from the finished edge. This will secure the second selvage. I run the inside edge of my 1/4" foot along the edge of the selvage when I sew.
Continue this process all the way down the paper foundation until you have about an inch or so of paper still showing.
On this piece I added one more narrow selvage. Try to keep the last pieced added to be at least one inch wide. This will help to reduce bulk as you join the wedges together to form the spiderweb.
The last piece should extend just to the tip of the paper with 1/4" slipped under the selvage above.
Repeat the entire process on the opposite side of the paper foundation and it should look something like this.
Flip over the section and get ready to trim.
Use the edge of the foundation to line up your ruler and use your rotary cutter to trim off the selvage ends that extend past the foundation.
You can remove the paper now or wait until you have a bunch completed. The paper should tear away easily if you use a nice small stitch length. Be careful not to stretch or distort the block as you remove the paper.
A completed section looks like this.
I join the sections together differently than in Bonnie's tutorial. If you join sections like Bonnie does you will create a straight setting. Your webs will line up across your quilt. If you join them like I do here, your webs will be offset. Place two sections right sides together and sew along the long edge. I line up the kite points and pin there. You may want to pin more.
I highly recommend that you press your seams open. This will greatly reduce bulk and make your assembly much easier and your quilt will lay nice and flat. Pressing seams with selvages open can be a challenge, but I learned to start in the center (where the points of the kite come together) and work to the edge when you're pressing. Open the center with your fingers, use the tip of your iron and open the seam as you float just above the fabric moving to the outer edge. Just touch the fabric enough to open the seam. Then press. Repeat for the other half, starting at the center and working to the other edge. If you try to go from one end to the other you'll be working against the selvages. Be sure to press again from the right side. Don't forget to trim those little triangles that extend on the corners. Again, it will help reduce bulk if you get rid of them.
It will take 4 of these blocks or 8 sections to form your first full spiderweb. It's time consuming, but you'll find a rhythm and you'll have a quilt in no time. Have a great weekend and don't forget to check out Quilting Month on Sew Mama Sew...some really cute quilts are being showcased!